Snake Backgammon Rules & How to Play
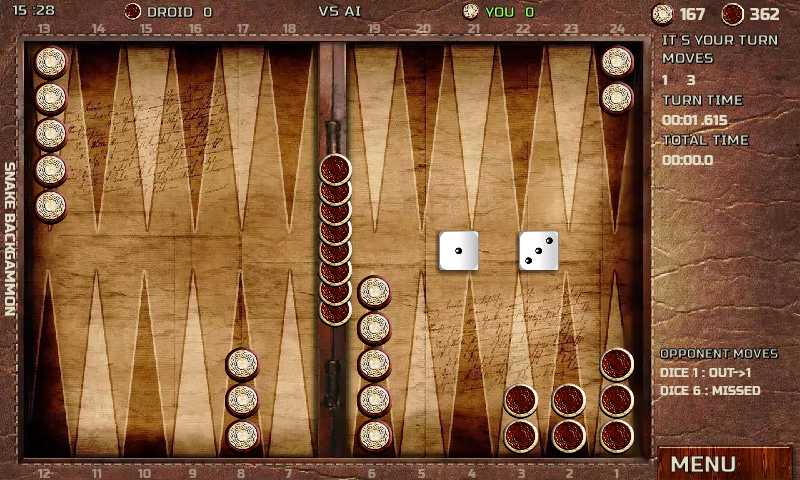
White starts in the normal position. Black starts with nine checkers on the bar and two each on White’s 1, 2, and 3 points. It is included in Backgammon 18 Games, the free Android and iOS app by Geimz ltd.
At a glance
- Hitting
- Yes. A lone checker is hit and sent to the bar.
- Direction
- Players move in opposite directions.
- Doubling cube
- Yes
- How you win
- Bear off first. A gammon scores double, a backgammon triple.
Rules
Rule Differences from Regular Backgammon
White starts with his fifteen checkers set up in the normal position. Black starts with nine checkers on the bar, and two checkers each on White's one-point, two-point, and three point.
The rules are the same as in backgammon, but the strategy is quite different because of the unusual nature of Black's position.
Snake is intended to give practice in how to play, and how to play against an extreme back game.
Learn with examples
These practice positions explain legal moves, not the best strategy. Each example is a separate position; special opening and scoring rules are described above.
Starting layout
For these examples, number the points along your own route from 24 down to 1. Your home is 6–1. The opponent has their own numbering; screen orientation can differ. The table describes the app variant.
| Point or location | Checkers |
|---|---|
| 24 | 2 |
| 13 | 5 |
| 8 | 3 |
| 6 | 5 |
| Point or location | Checkers |
|---|---|
| 24 | 2 |
| 23 | 2 |
| 22 | 2 |
| Bar: hit checkers waiting to re-enter | 9 |
Players move in opposite directions.
A move with 3 and 2
Consider a middle-game position: all checkers have entered, opening restrictions are satisfied, and you have no pinned checkers or checkers on the bar. One of your checkers is on 10; points 7, 8 and 5 are empty.
With 3 and 2, move that checker 10 → 7 → 5. You can also play 10 → 8 → 5 by using the 2 first. Each arrow uses one die. If both intermediate points, 7 and 8, are blocked, this checker cannot reach 5 in that turn just because 3 + 2 = 5.
Meeting an opposing checker
Separate example: your checker is on 10 and an opposing checker stands alone on 7, outside your home. You have no checker on the bar and already have a checker in your home. A 3 lets you move 10 → 7 and send the opposing checker to the bar. Two opposing checkers on 7 would block that move.
Bearing off: an exact roll and a larger roll
You have already borne off all but two checkers. The remaining two are free in your home: one on 5 and one on 3. There are no checkers on the bar or waiting to enter. You roll 6 and 3.
Use the 3 to take the checker off point 3. Then use the 6 to take the checker off point 5: there is no checker on 6 or any higher point. Both checkers leave the board. Whether this wins the game depends on the variant; Backgammon to Lose reverses the objective.
Common mistakes to avoid
- Adding the dice together and ignoring the intermediate landing point. A move using both dice must be legal in at least one order.
- Bearing off a lower checker with a larger die while another checker remains higher. For example, a 5 cannot bear off from 4 while you still have a checker on 6.
- Giving both players the same starting position. The side with nine on the bar must re-enter them before moving its other checkers.
Examples use the rules on this page and the app’s starting layouts. Background on standard movement: Backgammon Galore
Also called Extreme back game. Choose it from the game list, then play offline, online, or with a friend.